
Cement pots have become one of the most popular choices for home gardening—whether for succulents, indoor plants, flowering plants, or outdoor décor. Their durability, modern look, and affordability make them an excellent alternative to plastic or ceramic pots. While cement pots in markets can be costly, the good news is you can make professional-quality cement pots at home with just a few materials and simple techniques.
This complete, detailed guide will walk you through the easiest professional way to make cement pots, from preparing the mold to final finishing. Whether you’re a beginner or a DIY enthusiast, this tutorial will help you create beautiful, long-lasting pots effortlessly.
🧱 Why Make Cement Pots at Home?
Before we begin, here are a few reasons DIY cement pots are worth trying:
✔ Cost-Effective
You can make large, stylish pots at home for a fraction of the market price.
✔ Highly Durable
Cement pots last for years and withstand sun, rain, and wind.
✔ Customizable
Make any shape, size, or design you want.
✔ Perfect for All Plants
Excellent drainage, root support, and temperature control.
✔ Fun DIY Project
Relaxing and creative activity for gardeners and craft lovers.
🧰 Materials You Need
To make perfect cement pots at home, gather the following simple materials:
Main Ingredients
- Cement (Grey or White)
- Sand
- Water
Molds Required
- A large container (outer mold)
- A smaller container (inner mold)
(Plastic boxes, old bowls, buckets, food containers—anything can be used.)
Additional Tools
- Oil for lubrication
- Measuring cup
- Spatula or stick for mixing
- Drill (optional for drainage holes)
- Gloves (important for safety)
🧱 Step 1: Preparing the Perfect Cement Mix
A strong and crack-free cement pot depends on the correct ratio of cement and sand.
✔ Ideal Mix Ratio
1 part cement : 1 part sand
For smoother pots, use slightly more cement.
✔ Mixing Steps
- Pour cement and sand into a bucket.
- Mix dry for 1–2 minutes.
- Add water slowly—don’t add all at once.
- Stir until the mixture becomes thick and smooth like cake batter.
✔ Consistency Check
- Not too watery
- Not too dry
- Should pour easily but still hold shape
This consistency ensures your pot is strong and even.
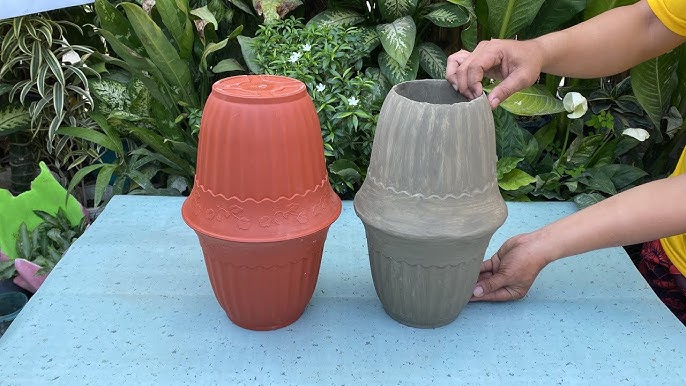
🪟 Step 2: Preparing the Molds
Molds are the most important part of making cement pots.
✔ Choose Mold Size
- Outer mold decides the pot’s outer shape.
- Inner mold creates the hollow space.
✔ Oil the Molds
Apply oil or petroleum jelly inside the outer mold and outside the inner mold.
This prevents the cement from sticking, making demolding easy.
🧱 Step 3: Pouring the Cement Mixture
- Pour the cement mix into the outer mold until it’s halfway full.
- Place the inner mold in the center.
- Fill the remaining space around the inner mold with cement mix.
- Tap the sides gently to remove air bubbles.
Important Tip:
Place a weight (stones, water-filled cup) inside the inner mold to prevent it from floating.
🕒 Step 4: Setting and Drying the Pot (Curing)
Proper drying is the secret to a strong and crack-free pot.
✔ Initial Drying
Leave the mold untouched for 24 hours.
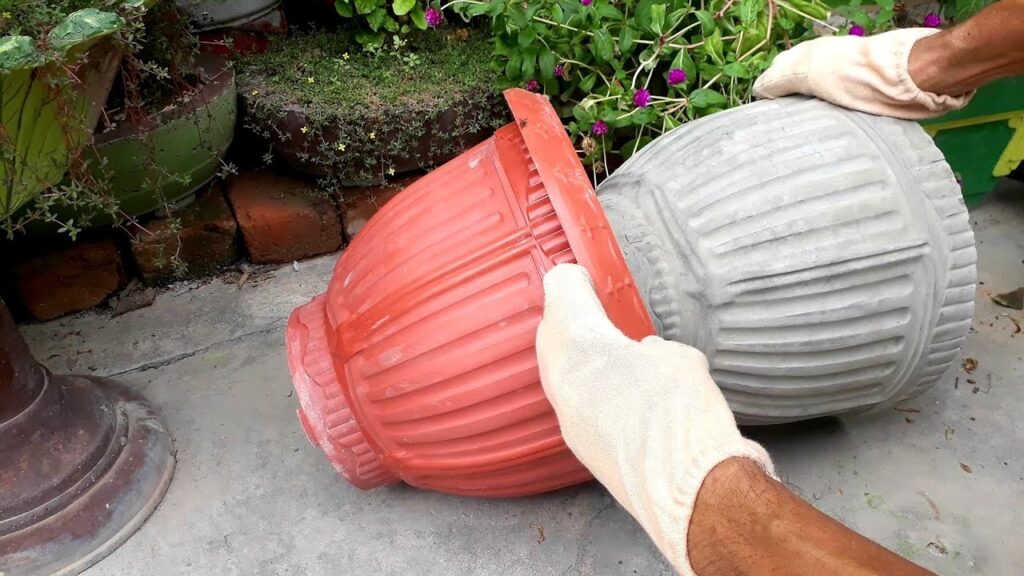
✔ Demolding
Gently remove the pot from the molds.
✔ Curing Process
To avoid cracks:
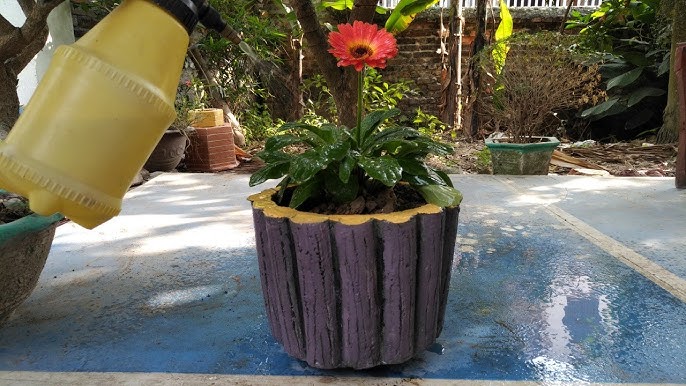
- Sprinkle pot with water daily
- Keep in shade
- Cure for 5–7 days
This strengthens the pot and improves its lifespan.
🛠️ Step 5: Smoothing and Finishing the Pot
After curing, your pot may have rough edges.
✔ Sanding
Use sandpaper to smooth:
- Outer surface
- Inner walls
- Rim edges
✔ Drilling Drainage Holes
If your mold didn’t create a bottom hole:
- Use a drill to make 1–2 drainage holes
- This helps prevent overwatering in plants
✔ Optional: Add Texture or Designs
You can get creative:
- Press leaves or patterns onto wet cement
- Apply textured paint
- Draw geometric lines
🎨 Step 6: Painting and Waterproofing (Optional but Recommended)
While cement pots look good naturally, painting them can enhance durability and style.
✔ Best Paint for Cement Pots
- Acrylic paint
- Waterproof wall paint
- Spray paint
✔ Seal the Inside
Apply a thin coat of clear varnish or waterproof sealant on the inside.
This reduces lime leaching, which helps protect delicate plants.
✔ Let the Paint Dry Completely
Allow 24 hours before planting anything.
🌱 Step 7: Potting Soil and Planting Your Favorite Plants
Once your pot is ready, fill it with the right soil mix depending on your plant type.
✔ For Succulents & Cactus:
- 40% sand
- 40% soil
- 20% compost
✔ For Flowers & Leafy Plants:
- 50% garden soil
- 30% compost
- 20% cocopeat
✔ For Indoor Plants:
- 40% cocopeat
- 40% compost
- 20% perlite
🌿 Common Mistakes to Avoid
To make perfect pots like professionals, avoid these mistakes:
❌ Too much water in cement mix
Leads to weak, brittle pots.
❌ Skipping mold oiling
Pot gets stuck inside molds.
❌ Not curing properly
Results in cracks and short lifespan.
❌ Removing from mold too soon
Pot loses shape or breaks.
❌ Using very thin walls
Pot becomes fragile.
🏆 Pro Tips for Professional-Quality Cement Pots
⭐ TIP 1: Double Molding Technique
Use a plastic cup inside a plastic bowl for perfect round pots.
⭐ TIP 2: Add Fibers
Mix coconut fiber or jute fiber to increase pot strength.
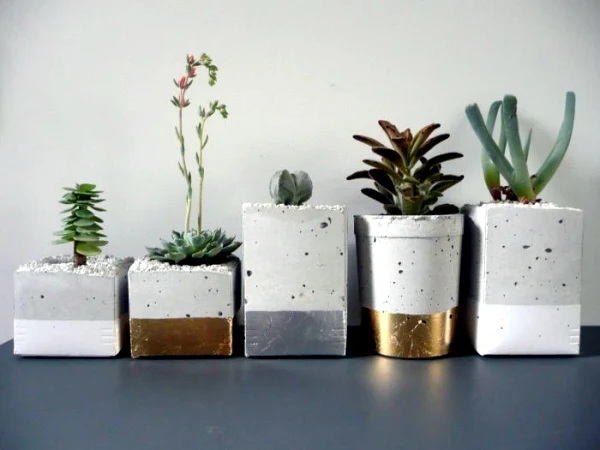
⭐ TIP 3: Use White Cement for Designer Pots
White cement makes clean, premium, and glossy pots.
⭐ TIP 4: Try Different Shapes
Use:
- Juice bottles
- Old food containers
- Square tiffins
- Planter molds
- Buckets
⭐ TIP 5: Preheat the mold in sun
Warm mold = fewer cracks and smoother finish.
🌸 Why Cement Pots Are Better Than Plastic Pots
✔ Eco-friendly
✔ Breathable material
✔ Keeps plant roots cool
✔ Looks premium and modern
✔ Strong and long-lasting
Cement pots give your home garden a classy touch with minimal expense.
🏡 Final Thoughts
Making cement pots at home is one of the most rewarding DIY gardening projects. With just cement, sand, water, and a pair of molds, you can create stunning planters that are durable, stylish, and budget-friendly.
Whether you want small succulent pots or large outdoor planters, this easy professional method works perfectly for all sizes. Once you master the basic technique, you can experiment with shapes, textures, designs, and colors to match your home décor.
Start today—turn a simple pile of cement into beautiful handmade pots and give your plants the stylish home they deserve!