Gourds—also known as lauki (bottle gourd), tinda, ridge gourd, sponge gourd, bitter gourd, ash gourd and more—are among the most versatile and fast-growing vegetables you can grow at home. Whether you have a terrace, balcony, or small backyard, gourd plants can reward you with plenty of fresh vegetables almost daily. With the right setup, one healthy gourd vine can produce 15–40+ gourds in a single season!
This guide gives you full information—from selecting seeds to harvesting—so even beginners can grow a lush, productive gourd garden at home.
🌱 Why Grow Gourds at Home?
Gourds are ideal for home gardening because:
- They grow extremely fast
- They thrive in Indian climates
- They require only basic care
- They climb easily when given support
- They produce lots of fruits
- They resist most pests naturally
- They can be grown in pots or ground
Plus, homegrown gourds taste sweeter, tender, and fresher than anything you buy from the market.
🌿 Types of Gourds You Can Grow Easily
Here are the most common and beginner-friendly ones:
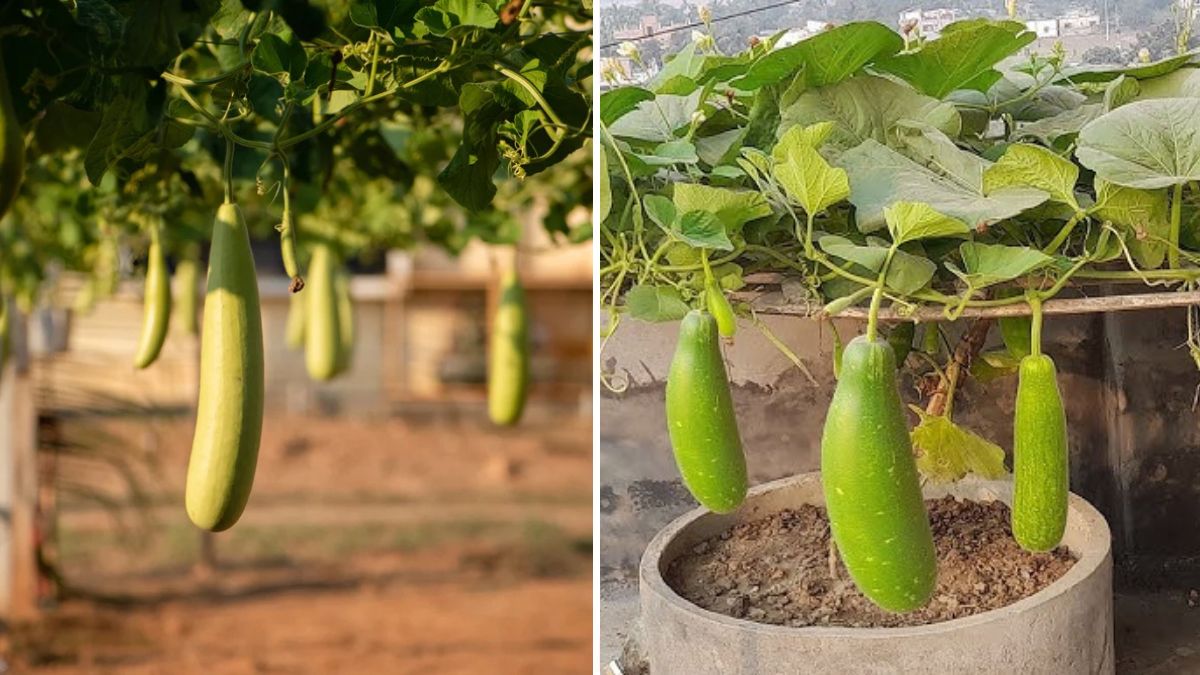
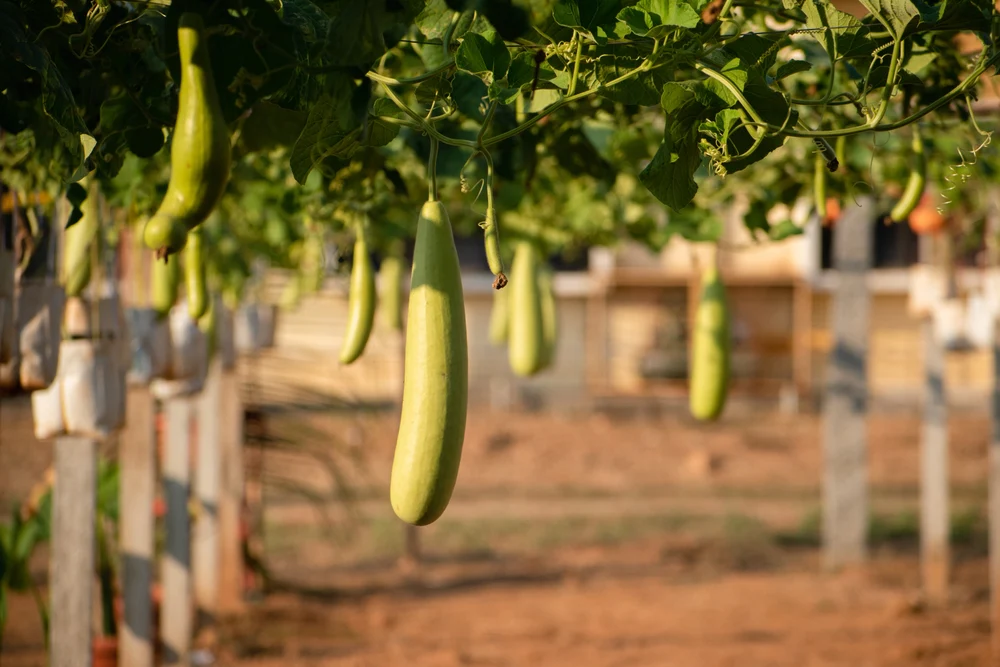
✔ Bottle Gourd (Lauki)
Fast-growing, heavy yield.
✔ Ridge Gourd (Turai)
Crisp texture, ideal for trellises.
✔ Sponge Gourd (Gilki/Luffa)
Very productive, grows rapidly.
✔ Bitter Gourd (Karela)
High in nutrients, grows well in most conditions.
✔ Ash Gourd (Petha/Kumhada)
Large fruits, needs more space.
You can grow all these varieties with the same basic method.
🌱 Step 1: Choosing the Right Seeds

Always choose high-quality hybrid or desi seeds. For best results:
- Buy from a trusted nursery or brand
- Choose fresh seeds (1 year old or less)
- Avoid shriveled or damaged seeds
If growing bitter gourd or ridge gourd, soaking seeds in water for 8–12 hours speeds up germination.
🪴 Step 2: Selecting the Perfect Pot or Grow Bag
Gourd plants grow BIG; they need space for roots to expand.
✔ Best size for growing gourds in pots:
- Minimum 18–24 inches wide
- At least 18 inches deep
- 25–40 liter grow bags are ideal
✔ For ground planting:
- Loosen soil 1–1.5 feet deep
- Mix compost thoroughly
Good drainage is essential, as gourds don’t like waterlogging.
🌱 Step 3: Soil Preparation (Very Important)
Gourd plants love loose, nutrient-rich, and well-draining soil.
🌿 Best soil mix:
- 40% normal garden soil
- 40% compost or cow dung manure
- 20% cocopeat or sand
Add:
- Neem cake powder (handful)
- Bone meal or mustard cake (optional)
This gives strong roots and boosts fruit production.
🌤 Step 4: Planting Seeds the Right Way
- Fill your container with the soil mix.
- Plant 2–3 seeds at the center, 1 inch deep.
- Cover lightly with soil.
- Water gently.
Germination Time:
- 4–7 days in summer
- 7–12 days in winter
Once seedlings grow 4–5 inches tall, keep only one healthy plant and remove the weaker ones.
🌞 Step 5: Sunlight Requirements
Gourds LOVE sunlight.
- 6–8 hours of direct sunlight daily is ideal
- Place your pot on a terrace or open balcony
- In low sunlight areas, fruiting will be slow
More sunlight = more flowers = more fruits.
🌿 Step 6: Watering Schedule
Gourd plants drink a lot of water, but they hate soggy soil.
Water like this:
- Daily in summer
- Every 2–3 days in winter
- Keep soil moist, not muddy
If leaves droop in afternoon heat, that’s normal—they recover by evening.
Mulch the soil with dry leaves or straw to retain moisture.
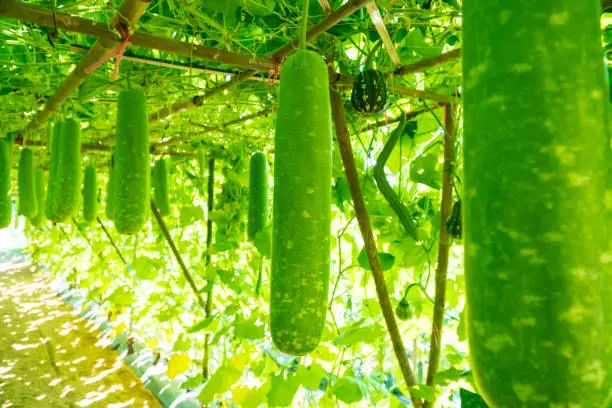
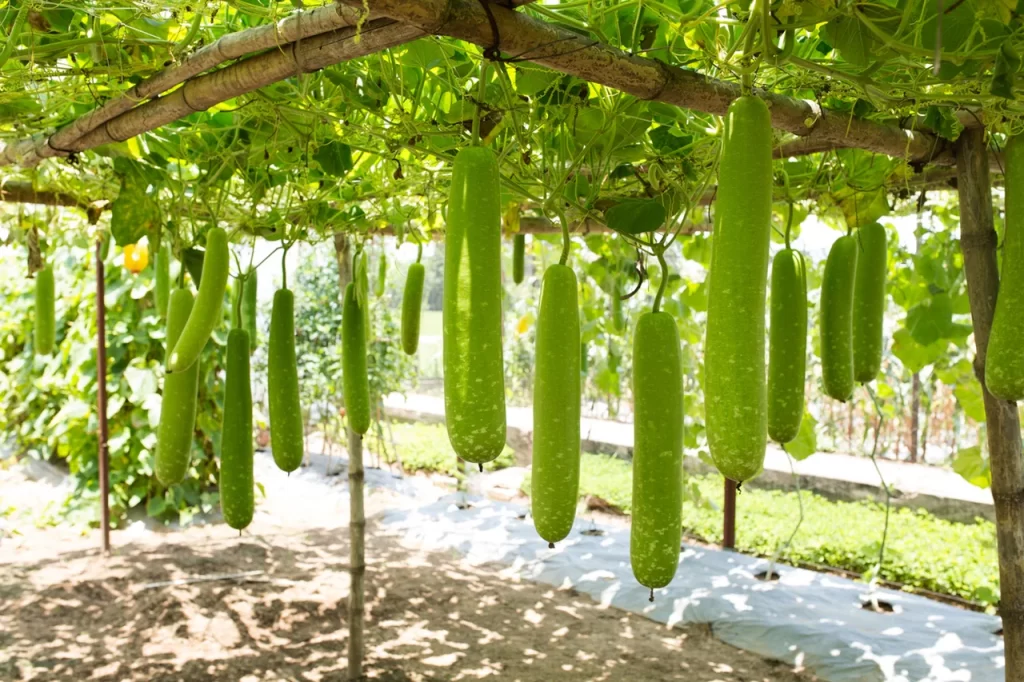
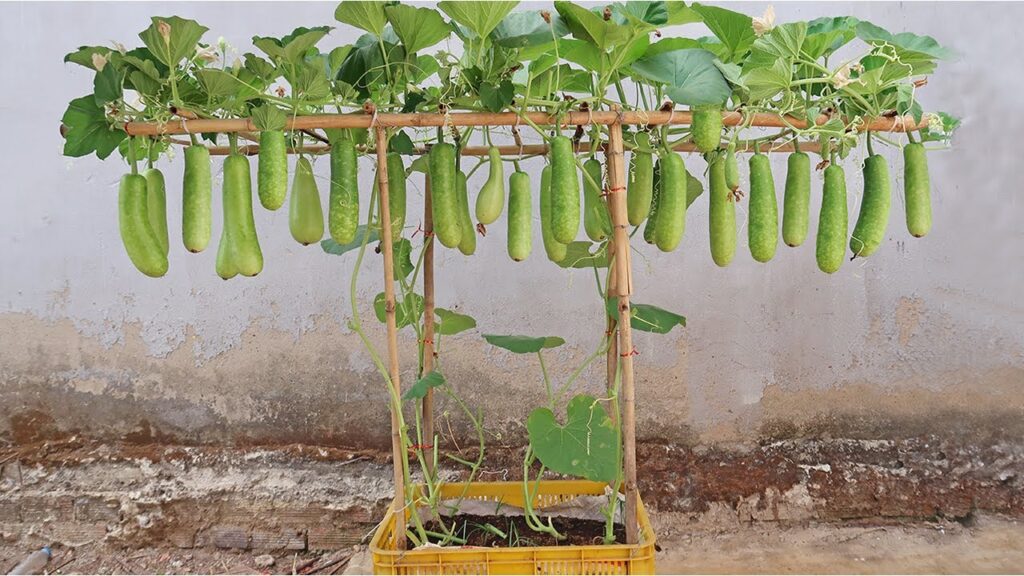
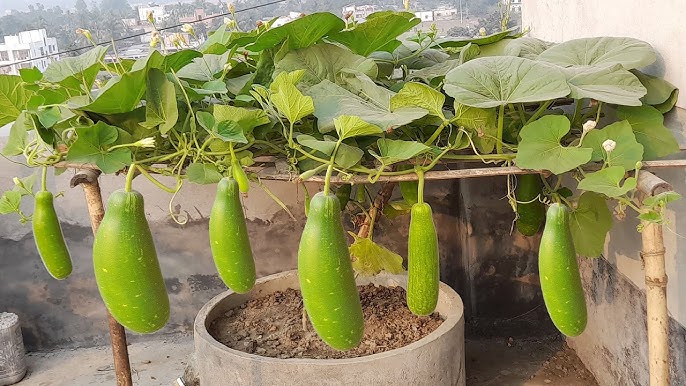
🧱 Step 7: Support Structure – Trellis Is Essential
Gourd plants spread aggressively.
Without support, they will crawl on the ground and produce fewer fruits.
✔ Best support options:
- Bamboo poles
- Rope trellis
- Metal grill
- Balcony railings
- Overhead pergola
Train the vines upward by gently tying them using soft cloth or jute rope.
This gives:
- Better flowering
- Cleaner fruits
- Bigger yields
- Less disease
🌸 Step 8: Flowering & Pollination Tips
Gourd plants produce male and female flowers separately.
- Male flowers: thin long stems
- Female flowers: small baby gourd behind the flower
Pollination happens naturally by bees.
But in urban balconies, bees may be fewer.
To increase fruit set:
- Grow flowers nearby (marigold, sunflower)
- Hand-pollinate using a small brush
- Shake the vines gently in morning hours
More pollination = more gourds.
🌿 Step 9: Fertilizing for Maximum Fruit Production
Feed the plant every 15–20 days.
Best fertilizers:
- Vermicompost
- Cow dung compost
- Mustard cake water
- Banana peel fertilizer
- Seaweed extract
Once flowering starts, add:
- Potash-rich fertilizer (like banana peel water)
Avoid overfeeding with nitrogen—this causes excessive leaves and fewer fruits.
🐛 Step 10: Managing Pests & Diseases
Gourds are relatively hardy, but may face:
✔ Common pests:
- Aphids
- Whiteflies
- Mealybugs
- Caterpillars
Natural solutions:
- Neem oil spray (weekly)
- Soap water spray for whiteflies
- Hand-pick caterpillars
✔ Common diseases:
- Powdery mildew
- Yellowing leaves
- Root rot
Solutions:
- Provide good sunlight
- Avoid overwatering
- Improve airflow
Healthy plants rarely get sick.
🍃 Step 11: Growth Timeline
Here’s what to expect:
Month 1
Germination + initial vine growth
Month 2
Plant grows vigorously, spreading vines
Month 3
Flowering begins
Month 3–4
Fruit set and early harvest
Month 4–6
Peak production—plants give vegetables almost every day
🥒 Step 12: Harvesting Gourds the Correct Way
Each gourd variety has different harvest times:
- Bottle gourd: 45–60 days
- Ridge gourd: 50–70 days
- Sponge gourd: 70–80 days
- Bitter gourd: 50–70 days
- Ash gourd: 90–120 days
Harvesting Tips:
- Cut gourds while tender
- Use scissors or pruners
- Do not pull by hand
- Harvest regularly to encourage continuous fruiting
Overripe gourds stop the plant from producing more.
🌾 Bonus Tips for Huge Yields
- Give strong sunlight
- Keep one plant per pot
- Add compost every 2–3 weeks
- Provide good support for vines
- Pollinate early morning
- Water regularly
- Prune excess side vines
Following these tips can double or even triple your harvest.
🌟 Final Thoughts
Growing gourds at home is not just easy—it’s highly rewarding. With basic care, sunlight, and proper support, your plant can turn into a lush green vine loaded with fresh, tender vegetables throughout the season. Whether you grow lauki, karela, ridge gourd, or any other variety, the method remains simple and achievable for every home gardener.
If you want, I can also create: