Growing your own vegetables at home doesn’t always require large garden beds or expensive containers. With a little creativity, even waste plastic bottles can be turned into productive mini-gardens. Among all the vegetables you can grow in containers, radish is one of the easiest, fastest, and most rewarding. It grows quickly, requires very little care, and reaches harvest in 25–35 days.
If you want to grow fresh, crunchy, and chemical-free radish at home—even in small spaces—this guide will show you how to do it step-by-step using nothing but discarded plastic bottles.
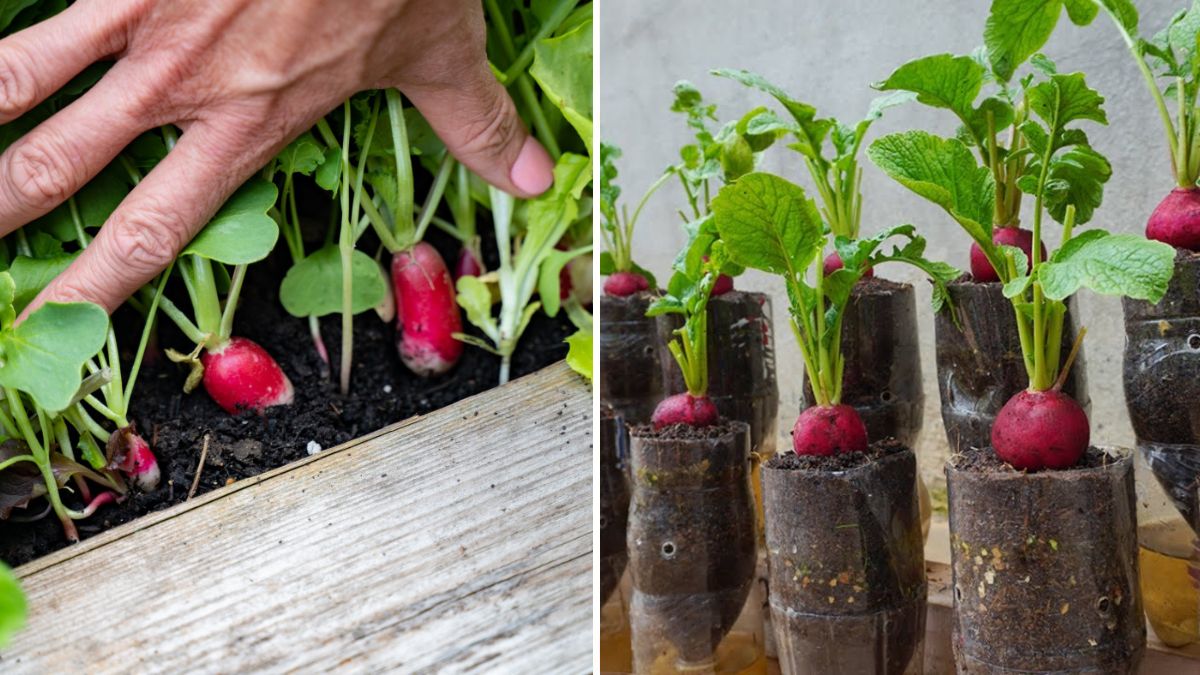
🌿 Why Grow Radish in Waste Bottles?

Reusing plastic bottles is not only eco-friendly but also extremely practical for urban gardening. Here’s why this method works beautifully:
- ✔ Zero cost containers – No need to buy pots.
- ✔ Perfect for balconies, terraces, or windowsills.
- ✔ Easy handling – Bottles are lightweight and movable.
- ✔ Ideal for kids and beginners.
- ✔ Fast results – You’ll see leaves within days.
- ✔ Saves space – Vertical or horizontal setups both work.
Radish has a shallow root system, grows fast, and thrives in simple setups, making it perfect for bottle gardening.
🥕 Best Radish Varieties for Bottle Gardening

For plastic bottle planting, choose short and round or medium-length radish varieties, such as:
- Cherry Belle
- French Breakfast
- Scarlet Globe
- Pusa Chetki (ideal for Indian climate)
These varieties mature quickly and don’t need deep soil.
🪴 Step 1: Prepare Your Waste Bottles

You can use 1-liter, 1.5-liter, or 2-liter bottles. Larger bottles are better because they give more space for root growth.
How to Prepare the Bottle
- Wash the bottle thoroughly.
- Cut it in one of two ways:
- Horizontal method: Cut horizontally to create a mini trough-like pot.
- Vertical method: Cut a rectangular window on one side while keeping the structure intact.
- Create 8–10 small drainage holes at the bottom using a hot needle or screwdriver.
- Save the bottle cap—poke 2–3 holes in it for drainage if you’re using vertical style.
Drainage is extremely important to prevent root rot.
🌱 Step 2: Prepare Nutrient-Rich Potting Mix
Radish needs loose, airy, and well-draining soil for proper root development. Compacted soil will result in thin or deformed radishes.
Perfect Potting Mix Recipe
- 40% garden soil or red soil
- 30% cocopeat (keeps soil loose & moist)
- 20% compost (vermicompost or cow dung)
- 10% sand (for drainage)
Optional Additives:
- 1 teaspoon neem cake powder (keeps soil disease-free)
- A handful of perlite or rice husk (improves aeration)
Fill the bottle up to 90% with this mix and level it gently—don’t press too hard.
🌱 Step 3: Seed Sowing Method

Radish seeds germinate very fast—usually within 3–5 days.
How to Sow
- Make small holes 1–1.5 cm deep.
- Sow 1–2 seeds per hole, spaced at least 3–4 cm apart.
- Cover lightly with soil.
- Spray water gently; never pour directly.
Germination Tip:
Keep the bottle in light shade until the seeds sprout. After sprouting, shift them to sunlight.
☀ Step 4: Provide Ideal Growing Conditions

Radish is a cool-loving crop, but it grows well all year if kept properly.
Sunlight Requirement
- 4–6 hours of direct sunlight daily.
- During harsh summer, protect from strong afternoon sun.
Temperature
- Best temperature range: 15°C – 28°C.
- Too much heat can cause radish to turn woody or spicy.
Watering
- Water lightly every day, but avoid overwatering.
- Keep soil moist but never soggy.
- Bottles dry out faster, so monitor moisture regularly.
🌿 Step 5: Thinning the Seedlings
Once the seedlings develop 2 true leaves, it’s time to thin them.
What is Thinning?
Removing extra seedlings so each plant gets enough space.
How to Thin
- Keep the healthiest one.
- Remove the smaller or weaker ones carefully.
Proper spacing helps the radish bulb form properly.
🌱 Step 6: Fertilizing for Fast Growth
Radish grows so quickly that heavy fertilizing is not needed.
Apply:
- 1 handful of compost after 10 days
- Liquid fertilizer (compost tea or cow dung water) every 7–10 days
Avoid nitrogen-rich fertilizers like urea—they cause leafy growth but no root development.
🪴 Step 7: Common Problems & Solutions
1. Radish is not forming roots
Cause: Overcrowding, hard soil, lack of sunlight
Solution:
- Thin seedlings
- Loosen soil
- Move bottle to a sunnier spot
2. Yellow leaves
Cause: Overwatering or nutrient deficiency
Solution:
- Reduce watering
- Add a handful of compost
3. Small radish bulbs
Cause: High heat or poor variety
Solution:
- Grow in cooler months
- Choose short-duration varieties
4. Pests (rare)
Radish is usually pest-resistant. But if aphids appear, spray Neem oil diluted in water.
🌿 Step 8: Harvesting Your Fresh Radishes
Radish becomes ready to harvest in 25–35 days depending on variety.
How to Harvest:
- Check the size of the bulb—if it peaks out of the soil and looks round and firm, it’s ready.
- Hold the base of the plant and pull gently.
- Don’t wait too long—overgrown radishes turn hard and spicy.
Bonus:
Radish leaves are edible too!
Use them in soups, parathas, or stir-fries.
🌱 Tips for Continuous Radish Supply
You can enjoy radish every week by following this simple trick:
- Sow 10–12 seeds every 7 days.
- This ensures a steady harvest all year long.
This is perfect for small spaces and balcony gardeners.
♻ Eco-Friendly Gardening: Turning Waste Into Food
Growing radish in plastic bottles not only gives you fresh vegetables but also helps reduce waste.
You’re transforming trash into productivity—a perfect example of sustainable urban gardening.
🌟 Final Words
Growing radish in waste bottles is an easy, fun, and rewarding gardening project for beginners, kids, and anyone with limited space. With the right soil, regular watering, and enough sunlight, you can enjoy fresh homegrown radishes within a month—all from something you were about to throw away!